


When I received my Tron it was in working order, and aside from needing a monitor cap, and new coin door lights, needed only cosmetic restoration. Both sides of the inner art were ripped, the front panel was scratched as the coin door just slightly rusted. both plastick blacklight covers were very faded and somewhat scratched. The previous owner had installed a new control panel overlay, and the joystick and spinner were in perfect condition. As is always the case with old Trons, the sideart was very scratched. Mine had been painted black around the edges where years of hands had turned the art white.


I removed the monitor shroud and class covers, which had 20 years of dust build-up. Took off the control panel, light assemblies, marquee, coin door, power supply block and boards. I didn't remove the monitor or speakers, so I tightly masked the cabinet interior.


I scraped the side-art off with a razor blade and hair dryer. It actually ended up peeling pretty good. I then sanded the cabinet with an electric orbital sander. As I went down through the layers I could tell it had been repainted in the past. I first sanded with 100 grit sandpaper, then again with 150, and finally with 220 to get a smooth finish before painting.


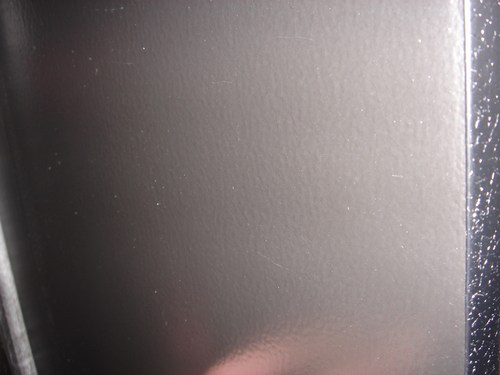
Next I painted. I did three coats of primer and two very thick coats of black, sanding VERY lightly between coats with 320 grit paper. I used a latex based satin black from Home Depot. It was actually one of their Disney line of paints called mouse ears and looked as close to a standard cab finish as I could find. Not so shiny as to reflect any lights, but still not totally flat. I used a very flat foam roller, and really concentrated on even application. I still had some texture to the final finish, but Im still happy with how it came out. Click the picture to the right for a look at the texture.


I also spray painted several of the metal components including the coin door, marquee frames and the metal peice that joins the upper blacklight plastic and lower screen glass. I've also started painting any external screws black. Its the small touches that really makes these games look new.


Next I removed all masking and preped the cabinet for art application. I thought I might apply the art "wet" so I actually let my final coats of paint dry a full 7 days before applying any artwork.
I then created a template for the inner art by taping several pieces of notebook paper together in the cab. Then I put the template over the art and cut. After doing some research via this post:
"Art Application - Wet vs Dry", I ended up going with the dry method for application of these peices. I taped the decals in place, then carefully, and slowly removed the backing. The art ended up perfectly in place and completely flat with no bubbles.
"Art Application - Wet vs Dry", I ended up going with the dry method for application of these peices. I taped the decals in place, then carefully, and slowly removed the backing. The art ended up perfectly in place and completely flat with no bubbles.


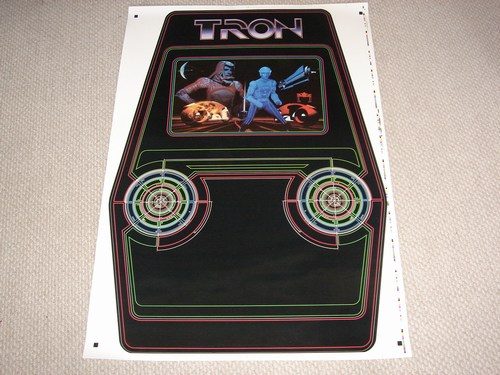
After applying the inner art, I put the control panel and lights in. I started a makeshift upper-blacklight backing. This was later replaced by some new, original material I received from collector Peter Hirschberg (first picture above). My lower assembly actually had a standard flourescent bulb installed, which I replaced with a new 18" blacklight bulb I picked up at the local Walmart. Both the upper and lower light covers were very faded and scratched. Along with my artwork, I purchased the acrylic plastic replacements sold by Phoenixarcade.


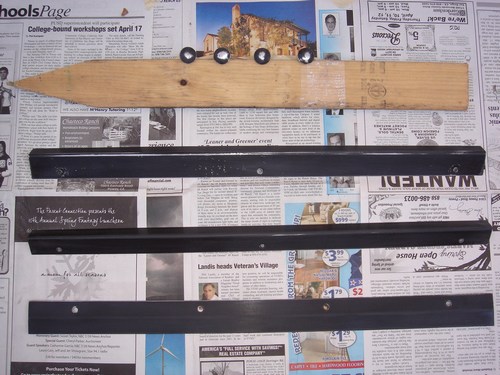
Next up I added new T-Molding from Arcadeshop Amusements. I'll notch any corner that's more than 45 degrees as shown. I put back the original marquee, which was in great shape, and reinstalled the newly painted coin door (still missing lights). With all the required brackets it was back to looking like a real Tron.


After a good 7 days of dry time, I was ready for side art. For these large pieces I went with the "wet method." First I made certain the cabinet surface was as smooth and clean as possible, then prepped the cab by putting tape guides to align with key points in the art, and attached a towel below the art area.


I completely peeled the art before application. Others have recommended peeling, spraying and rolling the art onto the surface in sections, but I chose not to. If using this method take care not to stick the art to itself. I used sections of the backing to hold down the peeled portion.


I filled a bottle with water and a few drops of dish soap. On my prior art application I used Windex, and it came out fine, but many recommended not using Windex for fear that the Ammonia would effect the colors in the art, or leave residue between the cabinet surface and adhesive. I sprayed both the surface of the cabinet and the adhesive side of the art with a very light, but completely uniform layer of the soap solution. I then picked up the art and laid it against the cabinet. Its a bit intimidating when the art is first on the cabinet; it will be wrinkled and out of position. Just lightly pushing on it with your hands slides it into place and removes the large wrinkles, leaving only bubbles.


Once the art is placed, the water should be slowly pushed out from between the art and cabinet with a squeegee or other flat item. I used a small plastic ruler, with a soft rag around it. Others have used a credit card. Start at the center and work your way to the edges. Keep a rag handy to wipe up the fluid that comes out of the edges. My theory on the wet method is that, in addition to allowing placement of the art by sliding, it also creates a better seal between the art and cabinet. I believe that the removal of the water creates a vacuum effect, pulling the art down against the surface. On close inspection I can see the paint texture under my art. When finished, the art is completely flat against the cabinet, and the game finally looks complete.


While my Tron was in relatively good shape when received, it did have some of the standard problems for 25 year old monitors. The Electrohome G07-CBO monitor would flicker or shake during gameplay, and the pictures would occasionally pull, or bend, to one side. I would also notice flashing flecks or dots at certain times. I purchased a cap kit from "The Real" Bob Roberts, printed out the cap map and read all of his excellent articles on the G07 monitor:
I also read the Cap Kit Installation 101 instructional article and the solder tips it refers to. Armed with the great documentation Bob and others have put together, I discharged the monitor, pulled the chassis and neck board, replaced all of the capacitors, and re-soldered all of the connector plugs on the board. Much to my surprise, the process was relatively easy and, after a few adjustments, everything worked fine. The picture is now clear, crisp, and rock-solid.


Next up I added the freeplay rom from HobbyRoms.com. I found it strange that Tron did not have a built in freeplay setting, and fortunately so did Tim at arcadecollecting.com. Communication from HobbyRoms was first class and the chip arrived very well packaged. It was a snap to install, and I'm no longer opening my coin-door each time I want to play.
No pictures, but I did finally finish this off with new coin door lights and the battery upgrade. The only thing remaining is new back doors, which will I'll get to someday.
All content © 2002-2009, Jeff Civitate, all rights reserved.